Making the Print
Screen Prep for Printing-
OK. You have your art, screens and ideas prepared. It's time to print! When performing a print run, the screen needs to be prepared. Usually this is simply taping off the screen edges and making sure there aren't any open screen areas that aren't supposed to print. Something such as a screen label or note that was burned in to the emulsion to organize your screens really isn't needed at the printing stage so tape these items off. Before mounting the screen into the fixture, use clear packing tape to effectively block out non-printing areas from the final print. Clear packing tape works better than masking tape for screen masking because it isn't so sticky that it damages the emulsion when it's removed. Emulsion is tough, but not indestructible, stuff. Cleaning the screens between use with water (assuming water based ink) also loosens the adhesive of the packing tape so it comes off when it's supposed to -but not before! Do the tape-prep each time, and remove the tape during each ink washout. If the tape is doing it's job some ink will be trapped between the tape and screen. It is much easier to wash out ink before it dries! One final thing about taping a screen, when putting the tape mask on the screen, pay attention to any registration marks. For reg marks work on paper, they need to print with the image.
Here are some examples of the tape mask on a screen. Notice that the tape covers the transition between the frame and screen. Emulsion is never one hundred percent edge to edge coverage so taping off gaps are required.

In this case a minor hole in the screen is repaired with tape. It's hard to see in the photo but the tape is there!

Sometimes when distractions present, all the tape doesn't get put on. The result is simply an unintended print area. If this happens and the extra ink is in the trim area then print as usual, keeping ink off the problem area.

Set Up The Print Station-
This has been touched on a bit throughout the blog but not in an overly organized way, so here it is! The print stations in the lab I use are fairly basic. Two hinges screwed to a table edge that accept the screen printing frame. A 1/4" inch board, or platen, that raises the print surface to the level of the screen hinge bases. The platen is then positioned and simply taped to the table surface with masking tape.
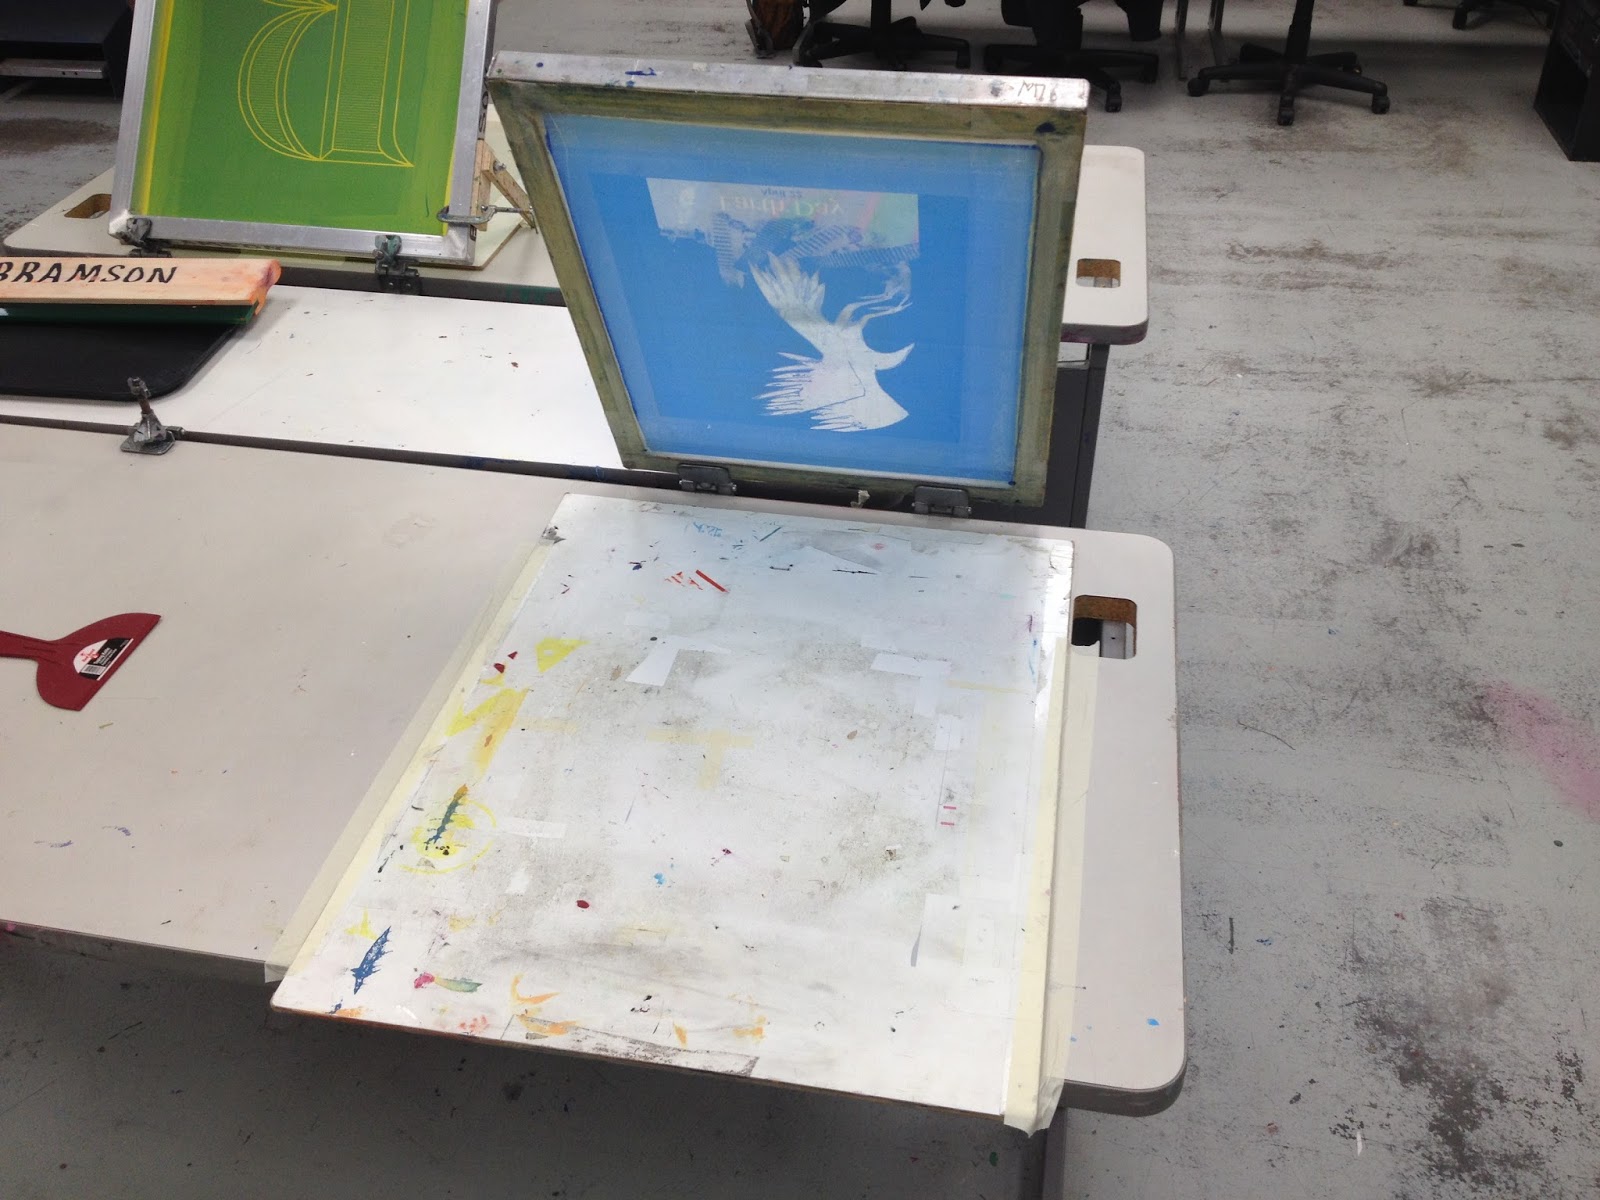
Once the platen is set a light coat of tack adhesive can be applied to keep the paper stock from moving around.If the platen has been in service long it's likely already tacky enough to use as is. Here the screen has been mounted in the hinge clamps and is set to start printing.
Finally the print station has been loaded with ink and is essentially ready to use. The tape registration marks have been set and the station is loaded with a scrap test paper to kick things off. A stand has been clamped to the right side and the upper stencil image has been completely blocked on the back side with packing tape. The top image will not print on this run! Two images were burned on one screen simply to conserve material. Load the ink in the middle (it's the new top) and pull a print.

The ideal configuration for the printers work space is unique to each print artist. The example below is how I prefer to set things up. The to-be-printed stock on the left, screen on the right side of the table and registration sheet opening out to the right. Missing in this photo is a kick stand. There was enough friction in this fixture to hold the screen up. If I'm using a station that isn't as tight I'll clamp the kickstand on the right side of the screen frame. If I'm really lucky, the drying rack will be right behind my print area.


The Mechanics of Printing-
First off, the screen is loaded with ink, flooding the printable area. Flooding involves a light drag with the squeegee to cover the open screen with ink. It's light enough to distribute ink but not so much pressure as to push much ink through the mesh. Flooding is also useful to keep the screen ready while fixing something a problem or waiting on another process to complete. It will help prevent water based inks from drying in the mesh and causing trouble for the print at hand. Plastisol inks do not suffer from premature drying since they need heat to set properly.
Put down a scrap test paper and then pull a print.
Hold the squeegee and tip it toward you at a roughly a forty-five degree angle. Then pull it from top to bottom of the screen image with a medium pressure. Tilting the squeegee down more than about forty-five degrees tends to smash a lot more ink through the screen. On paper the result can be some blown-out detail as the ink overwhelms the screen stencil. Scoop up the ink from the bottom and put it back up on top for the next print. Prop up the screen, remove the test print and get a look at it. If it's good, your set! Next, print on the Mylar sheet. The Mylar print is used to line align the image to the paper with some precision. Slip your printing stock under the Mylar print and move the paper where you want the print to go. Then, without disturbing the stock, flip the Mylar print out of the way and register your stock with taped corners or registration pins. Now media can be quickly placed for each new print and you should be set to print a run!
In the video clip above the print artist is following a set rhythm for his work. He has a kickstand on the right, a stop taped to the table for the stand leg, and taped corner registration. Here's his process, someone else's will be different. Experiment here for what works best for you.
- Locate the stock and set the screen down for printing.
- Makes two passes with ink scooping up ink and moving it to the top of the screen each time. If you're getting good ink coverage , one pass can be made. one or two passes with ink depends on what you are seeing in the print result.
- Flood the screen for the next print.
Some YouTube videos show printers pushing ink from bottom to top. This seem to be a matter of preference. Try it and see what technique works better.


Comments
Post a Comment